
Pokemon Unite Mamoswine Build & Guide
Melee
Intermediate
Defender
Mamoswine Moves
Learn how to use each move properly

Thick Fat
Passive Ability
Every time the Pokémon deals damage, its Defense and Sp. Def are increased for a short time (up to three times). When the Pokémon uses Ice Shard, Icicle Crash, or Ice Fang, its next basic attack becomes a boosted attack. In addition, if any of these moves creates a freezing area of effect inside an ally goal zone, it decreases the goal-scoring speed of opposing Pokémon inside that goal zone.

Attack
Basic Ability

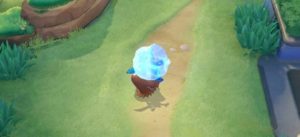
Ice Shard Move 1
7sArea
Hurls three chunks of ice at the designated location, dealing damage to opposing Pokémon in the area of effect and decreasing their movement speed for a short time. If an opposing Pokémon is hit by all three chunks, it is left frozen for a short time.

Ice Shard is Mamoswine’s basic damaging move. Use it on Wild Pokémon so your lane partner can easily kill them.
Use it to steal Wild Pokémon from enemies or you can also use it to zone them out if they’re trying to steal your side’s Wild Pokémon.
When your central laner tries to gank your lane, use Ice Shard in combination with Tackle to ensure that the frozen status will be applied to your enemies.
Ice Shard Upgrade Options

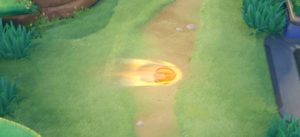
Icicle Crash
10sHindrance
Drops icicles on the designated location, dealing damage to opposing Pokémon in the area of effect and decreasing their movement speed for a short time. The final icicle shatters after a set amount of time or when hit by the user’s other moves or boosted attacks, dealing damage to opposing Pokémon in the area of effect and leaving them frozen. If the icicle is shattered by Tackle or High Horsepower, the ground is covered in ice, which increases the movement speed of ally Pokémon that runs over it.
Upgrade: The final icicle leaves the opposing Pokémon it hits unable to act for a short time.

Icicle Crash is the upgraded version of Ice shard. It deals more damage but there is a catch. You have to manually shatter the large icicle now to reliably freeze enemies using a boosted attack or your other moves. This is kind of a downgrade from the basic move but it adds a movement speed bonus effect if you used Tackle or High Horsepower to shatter it.
Due to its design, you always have to use it in combination with your other move to get the most out of it.
Once upgraded into Icicle Crash+ this becomes easier as the final icicle will stun enemies it hits in its upgraded form.

Ice Fang
8sHindrance
Uses cold-infused fangs to throw the opposing Pokémon frozen for a short time. The user can then designate a direction to slam the thrown Pokémon forward or backward, dealing damage to opposing Pokémon in the area of effect and leaving them frozen for a short time.
Ice Fang is an easy-to-land single target Hindrance move that encases the target in ice then throws them either in the front or in the back of Mamoswine.
You would usually want to throw the enemy to Mamoswine’s back so they will have a harder time escaping your team but if the enemy team is clumped up together, it might be better to simply throw it back where your target was picked up if there are enemies nearby because those said enemies would also be damaged and frozen once your target lands.
You can surprise enemies by using Ice Fang then Eject button in quick succession. This will cancel the initial animation and still connect to your target enemy. When doing this technique, using the portrait lock button will make it easier to execute.
You can also latch unto enemies under grass even if you use it outside the grass as long as the enemy is within range.
Ice Fang can connect on enemies beyond thin obstacles.
Tackle Move 2
8sDash
Has the user rush recklessly in the designated direction, dealing damage to opposing Pokémon it hits and throwing them.
Tackle is Mamoswine’s dash move that can pass through walls. You can use it like normal dash moves, to either get close to enemies or escape them. But the best way to use it is to activate it right after using Ice Shard to ensure that all three icicles will hit enemies.
Tackle Upgrade Options

High Horsepower
8sDash
Has the user rush recklessly in the designated direction, dealing damage to opposing Pokémon it hits and shoving them. The user then stomps its feet, dealing damage to opposing Pokémon in the area of effect and leaving them unable to act for a short time. This stomping deals increased damage to frozen opposing Pokémon.
Upgrade: Increases the reckless rush’s speed and the length of time opposing Pokémon are left unable to act.

High Horsepower is the upgraded version of Tackle. Instead of throwing enemies, they are dragged along with Mamoswine while it is unstoppable, immune to hindrances. It has amazing synergy with both the alternate moves.
With Ice Fang, it can be used to further drag the enemy deep into your territory after throwing them into your backside.
With Icicle Crash, it can be used to immediately shatter the final icicle, dealing so much damage and controlling enemies for a long period of time.
It can also be used in combination with Eject button. Eject into the enemy’s backside then drag them towards your team for a surprising wombo-combo. Defensively, you can also use this to drag enemies away from Drednaw, Rotom, or Zapdos.
Unlike Tackle, High Horsepower cannot be used to traverse over obstacles but the second part can sometimes pass through thin walls.

Earthquake
7.5sDash
Has the user leap up in the designated direction and then land forcefully, dealing damage to opposing Pokémon in the area of effect and pulling them toward the user.
Upgrade: Decreases the movement speed of opposing Pokémon for a short time when this move hits and increases the move’s pulling power.
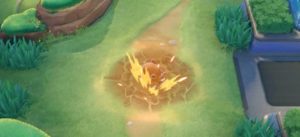
Earthquake is a wide area Hindrance move. It is best used when you have an ally with moves that rely on its teammate’s hindrances like Gardevoir with its hard-to-land skillshots.
Earthquake can be a devasting move to combo with your allies because it pulls enemies towards the center, Mamoswine itself.

Mammoth Mash Unite Move
Area
Has the user jump to the designated location and become immune to hindrances. The user then repeatedly stomps the ground, dealing damage to opposing Pokémon in the area of effect and decreasing their movement speed for a short time with each stomp. The final stomp throws opposing Pokémon in the area of effect.
Mammoth Smash is a devastating area Unite move that deals consecutive damage around Mamoswine and decreases the movement speed of enemies nearby. On the final stomp, enemies are thrown.
The only thing you have to note with Mammoth Smash is that it can be redirected using Eject button at all its stages.
Mamoswine Builds
Here are our Recommended builds on Mamoswine
Build Name: High Fang
Move Path
Level 1
Ice Shard
Level 3
Tackle
Level 6
Ice Fang
Level 8
High Horsepower
Held Items


Battle Item

The High Fang build is the true defender build. It gives Mamoswine the most efficient way to scale and be an impact on its team without taking resources by being not too level dependent.
![]() Exp Share will help you and your lane partner scale in terms of experience points. This will help you reach Mamoswine’s power spikes faster even while giving all the last hits to your lane partner.
Exp Share will help you and your lane partner scale in terms of experience points. This will help you reach Mamoswine’s power spikes faster even while giving all the last hits to your lane partner.
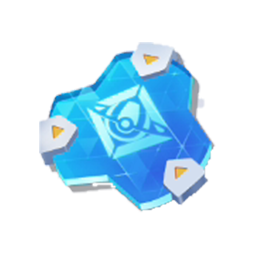
![]() Score Shield is a must for all Pokémon that are using scoring-based held items. Thanks to the natural high HP of Mamoswine and coupled with the bonus HP from Aeos Cookies and this held item, the shield passive from this item will be always high enough to easily score and stack Aeos Cookies. Plus, it will allow you to score by yourself later after zoning for your allies.
Score Shield is a must for all Pokémon that are using scoring-based held items. Thanks to the natural high HP of Mamoswine and coupled with the bonus HP from Aeos Cookies and this held item, the shield passive from this item will be always high enough to easily score and stack Aeos Cookies. Plus, it will allow you to score by yourself later after zoning for your allies.
![]() Aeos Cookies grants HP per each goal you score. One of the glaring problems with Mamoswine is that it evolves too late so it scales too slow. This is a big problem for a defender who should not take last hits from their carrying teammates. Aeos Cookies remedies some of the scaling issues by allowing Mamoswine to scale its HP of off scoring goals instead.
Aeos Cookies grants HP per each goal you score. One of the glaring problems with Mamoswine is that it evolves too late so it scales too slow. This is a big problem for a defender who should not take last hits from their carrying teammates. Aeos Cookies remedies some of the scaling issues by allowing Mamoswine to scale its HP of off scoring goals instead.
![]() Eject Button helps Mamoswine catch enemies off guard when combined with its moves. It can be used in combination with almost all of Mamoswine’s moves as discussed in the move guide section.
Eject Button helps Mamoswine catch enemies off guard when combined with its moves. It can be used in combination with almost all of Mamoswine’s moves as discussed in the move guide section.
Build Name: Icicle Horsepower
Move Path
Level 1
Ice Shard
Level 3
Tackle
Level 6
Icicle Crash
Level 8
High Horsepower
Held Items


Battle Item
The Icicle Horsepower build addresses the late power spike issue in a more direct way, by turning Mamoswine into a carrying central laner. With this build, Mamoswine is able to access its Unite move the earliest, deal lots of burst damage, and rally its team into team fights.
![]() Muscle Band deals a percentage of opposing Pokémon’s HP as damage for each basic attack. This will allow Mamoswine to clear the central lane faster allowing it to gank and rotate to its teammate quicker and it will also allow Mamoswime to have some additional damage per second. Additionally, the bonus attack speed helps Mamoswine dish out more of its stunning boosted attack.
Muscle Band deals a percentage of opposing Pokémon’s HP as damage for each basic attack. This will allow Mamoswine to clear the central lane faster allowing it to gank and rotate to its teammate quicker and it will also allow Mamoswime to have some additional damage per second. Additionally, the bonus attack speed helps Mamoswine dish out more of its stunning boosted attack.
![]() Buddy Barrier grants a lot of HP and a lot of shielding as well when the user activates its Unite move. This will allow Mamoswine to have a large impact on team fights by being an initiator who can dish out damage for the whole length of the team fight while being able to receive much damage at the same time.
Buddy Barrier grants a lot of HP and a lot of shielding as well when the user activates its Unite move. This will allow Mamoswine to have a large impact on team fights by being an initiator who can dish out damage for the whole length of the team fight while being able to receive much damage at the same time.
![]() Energy Amplifier increases the rate its user’s Unite move is charged. We are going to get Mamoswine’s Unite move faster using this build so might as well make it possible to use it more often as well.
Energy Amplifier increases the rate its user’s Unite move is charged. We are going to get Mamoswine’s Unite move faster using this build so might as well make it possible to use it more often as well.
Mamoswine Gameplay Guide
Mamoswine is a defender that specializes in applying hindrances to enemies. Mamoswine is also tough to kill and tough to play against because of its wide-area moves and boosted attack that can freeze enemies.
Mamoswine is one of the two defenders whose move upgrade timing and evolution levels are at levels 6, 8, and 10. At first glance, one would probably think that it would be hard to play a defender that relies on exp. But thanks to Aeos Cookies, Score Shield, and Exp Share, it is possible to scale Mamoswine without taking away resources from allies.
When laning, remember to fight up front with enemies and land your moves. It is important to establish your footing with Mamoswine and try to fight because of its Defense and Sp. Defense increases for a short time when hitting enemies thanks to its passive, Thick Skin.
Another feature of Thick Skin, which is quite overpowered, is that when Mamoswine’s moves create a freezing effect on allied goal zones, enemies who attempt to score will score have their goal-scoring speed slowed. This effect makes Mamoswine a natural counter to those who uses Score Shield.
If you wish to do so, you can also play Mamoswine in the central lane and it wouldn’t be an issue for your team because Mamoswine is actually a great ganker thanks to its array of moves that can apply hindrances, damage enemies, and give enough mobility for Mamoswine to get close and initiate fights.
When playing in the central lane, remember to clear all buffs fast and take the two Corphish nearby to reach level 5 quickly. Afterward, help one of the lanes until the Vespiquen and Combees spawn. Help the lane that is less exp dependent so you can steal some exp away from them. Try to secure all four Corphish in the middle lane, look for another gank then recall to repeat the process.
Remember to never stay longer than 10 seconds in a gank attempt because reaching level 10 is your top priority and of course, prioritize rotating to Drednaw above all else.
What is the role of Mamoswine when taking objectives?
Mamoswine’s role when taking Drednaw, Rotom, or Zapdos is being this big wall that exudes continuous pressure on enemies through hindrances. At the beginning of the objective fight, look for opportunities to apply hindrances on multiple enemies so your team can easily burst them down.
Once the objective is low enough drag enemies using High Horsepower away from the fight, especially those with burst damage capable of sniping the objective, to deny them the chance to steal.
When the going gets tough and enemies collapsed on your team, you can rely on your Unite move, Mammoth Mash to sway the fight in your favor.
Middle and Late Game
Using the High Fang build
The High Fang build is best for singling out enemies so they can easily succumb to your team with little risk. Look for overextended attackers or speedsters to throw using Ice Fang then drag them towards your team using High Horsepower to secure the kill. Never drag defenders towards your team because it will be free initiation for them, unless they’re the only one that remains to be knocked out, of course.
The High Fang build is also great for defending your attackers since you can easily punish speedsters who will dare to jump on your teammates.
Using the Icicle Horsepower build
The Icicle Horsepower build is superior for initiation. When pulled off correctly on grouped-up enemies, you’d be able to delete three or more enemies in an instant. Hide under grass and look for an opportunity to land an Icicle Crash into High Horsepower combo. When your teammates are late to respond to your initiation, you can always use your Unite move, Mammoth Mash to deal more damage or buy time.
When is the best time to use the Mammoth Mash Unite move
Mammoth Mash is best used on objective fights on Drednaw, Rotom, or Zapdos. These fights are where enemies are usually grouped up so Mamoswine’s Unite move will surely have a devastating on the enemy team.
Preferably, use it after High Horsepower so that enemies are dragged close together or when both the teams are nearing low HP so that your Unite move will have a clutch effect on the battlefield.
Did You Know?
Mamoswine’s tusks are made of pure, solid ice. They are extremely tough and can survive unimaginable long periods of harsh cold and hunger.
Pokemon Unite:: Mamoswine Spotlight Video
Watch this spotlight video to understand your pokemon better.